


With new crypto ecosystems popping up on a regular basis, the integration of different blockchain networks with popular wallets is a key narrative moving into the next crypto cycle.
Instead of having multiple wallet interfaces for different chains and tech stacks, in this blog, we’ll explore how you can link your MetaMask, a widely-used EVM DeFi wallet, with the Solana blockchain. This connection is made possible through a feature called MetaMask Snaps, specifically utilizing the Solflare MetaMask Snap.
Using this feature means that with one wallet you’ll be able to explore the plethora of Solana DeFi and Ethereum DeFi opportunities with unprecedented ease. Let’s get started!
MetaMask Snaps allows users to add features and functionality to their MetaMask wallet. Individual snaps are features created by third-party developers that MetaMask users can install directly into their wallets. It allows developers to create and integrate external applications with the MetaMask infrastructure. These applications are Javascript-based and can add a variety of functionalities to MetaMask.
In the context of Solana, Snaps facilitate the connection of a MetaMask wallet to networks outside the Ethereum Virtual Machine (EVM) ecosystem, such as Solana.
Solana’s integration into MetaMask represents a significant milestone, especially considering Solana’s non-EVM nature. Unlike networks like the BNB Chain, Arbitrum, Optimism, or Polygon, Solana operates on a distinct framework, requiring specific wallets for access.
Popular Solana wallets include Phantom Wallet and Solflare Wallet. The introduction of a Solana Snap by Solflare opens doors for MetaMask users to interact with Solana’s ecosystem, which itself includes a wide range of decentralized applications and smart contracts.
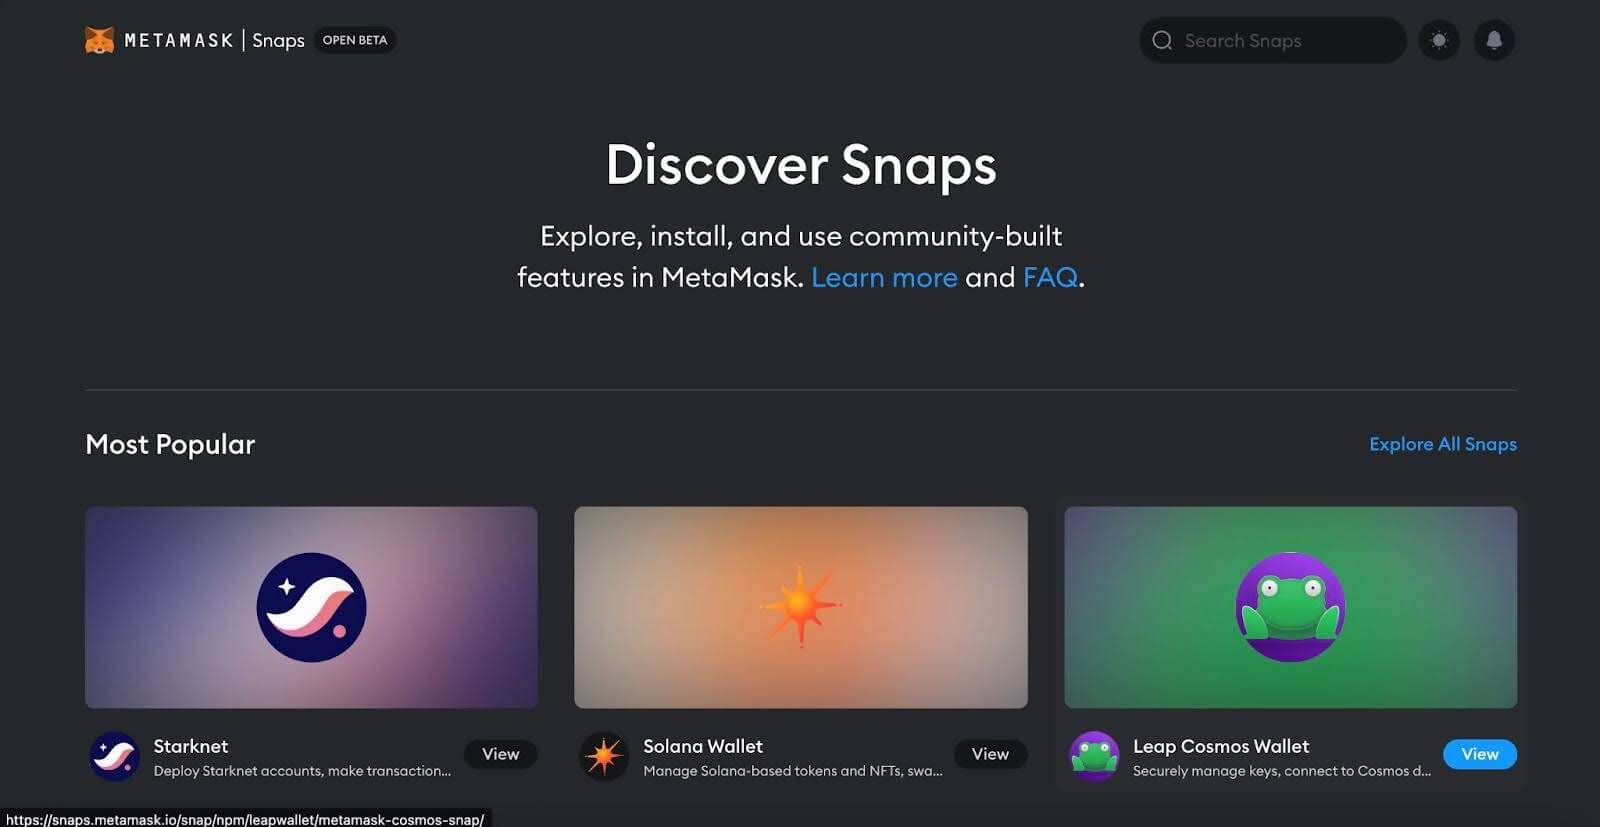
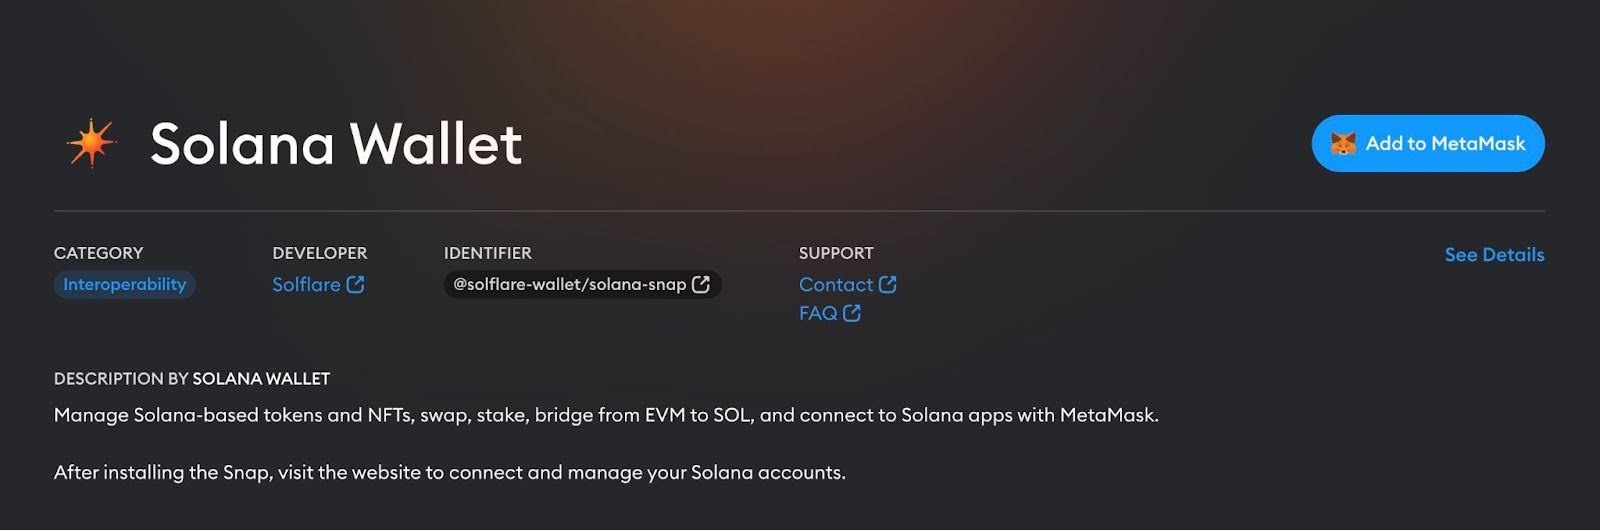
To begin, navigate to the MetaMask Snap Directory. Search for the Solana Wallet, specifically the one offered by Solflare. As of the time of writing, this is easily accessible from the MetaMask Snap Directory homepage. Click on ‘Add to MetaMask’ and follow the prompts to install. This process includes understanding and accepting the application permissions.
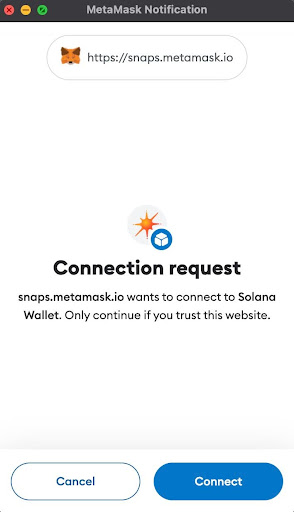
After installation, visit the Solflare Solana Snap platform. Start the onboarding process by clicking ‘Get Started’, followed by ‘Enter Solana’. This process will ready your Solflare Solana Wallet for use.
Once you finish the setup, you will arrive at the following screen:
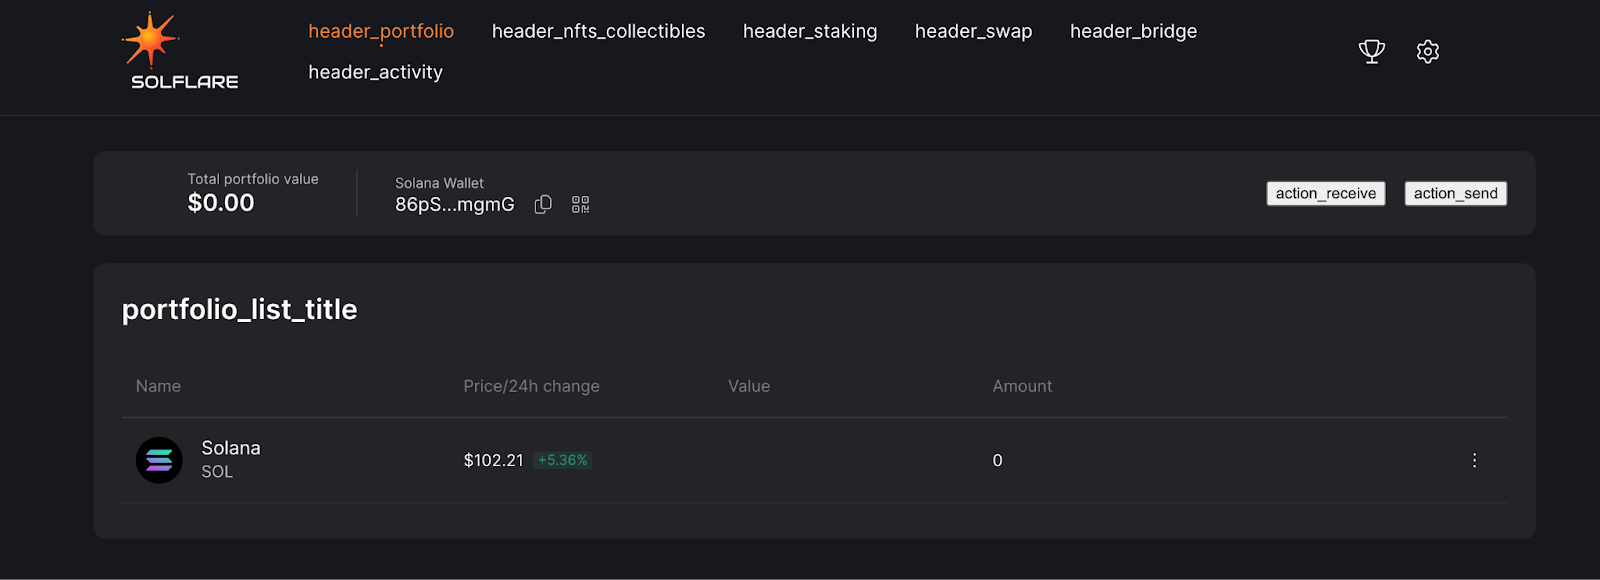
With the Solana Wallet Snap, you can manage your Solana portfolio through the Solflare interface. This includes sending and receiving crypto assets.
However, it’s important to note that direct management of Solana assets within MetaMask is not possible; it is facilitated through the Solflare wallet.
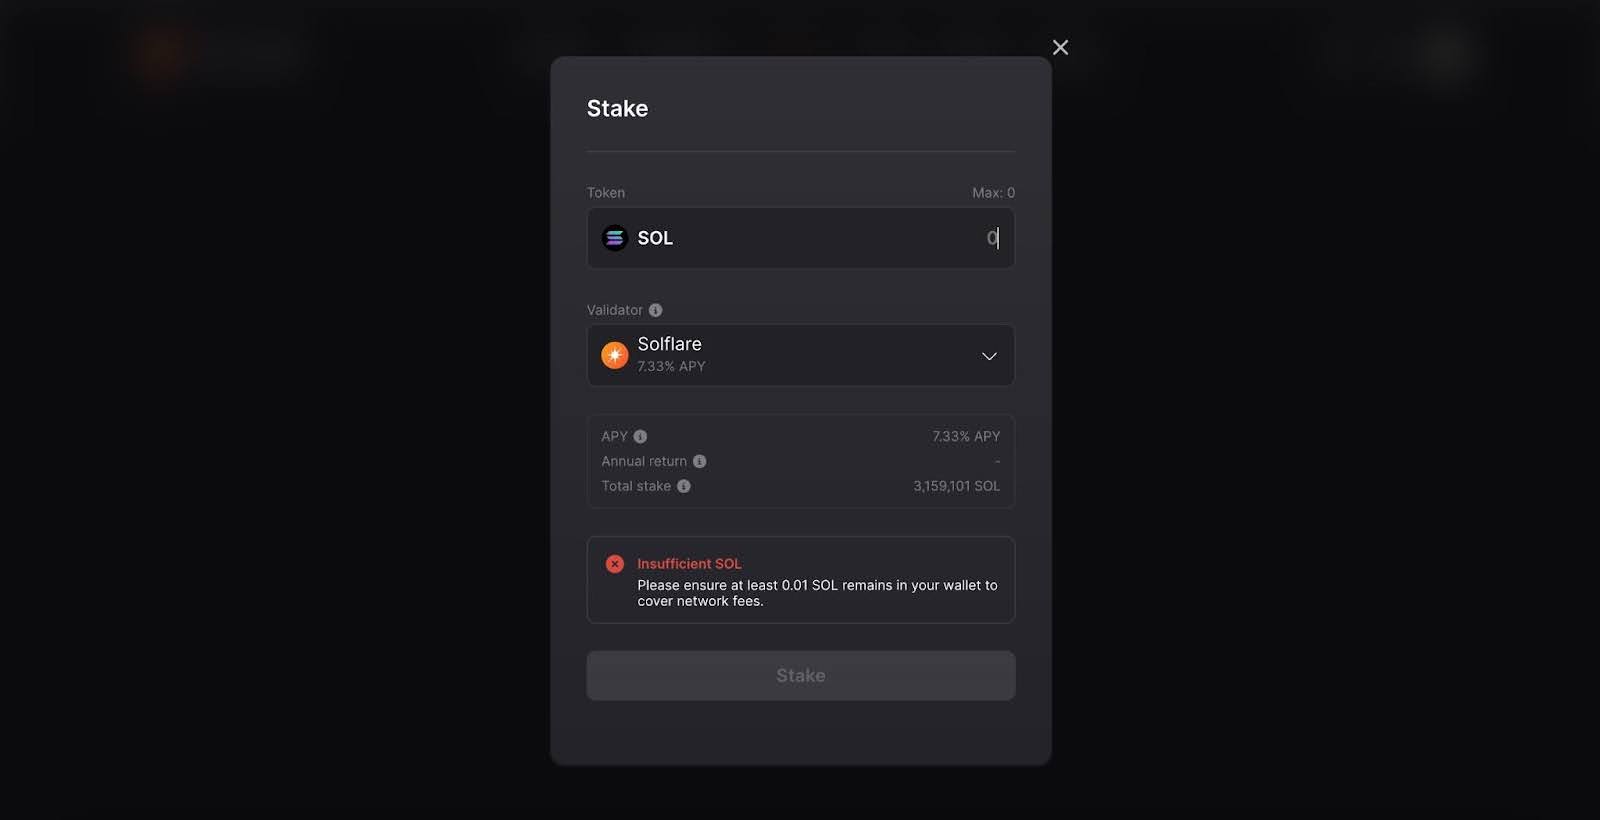
The Solflare interface also allows for asset swapping and staking. Navigate to the respective sections within the interface to swap assets or stake them with Solflare or other operators as they become available.
By heading over to the Stake tab, you can stake your SOL tokens using the interface as shown. Simply enter the amount of SOL you would like to stake, and then click ‘Stake’, before approving in your wallet.
The process is similarly straightforward for Swaps:
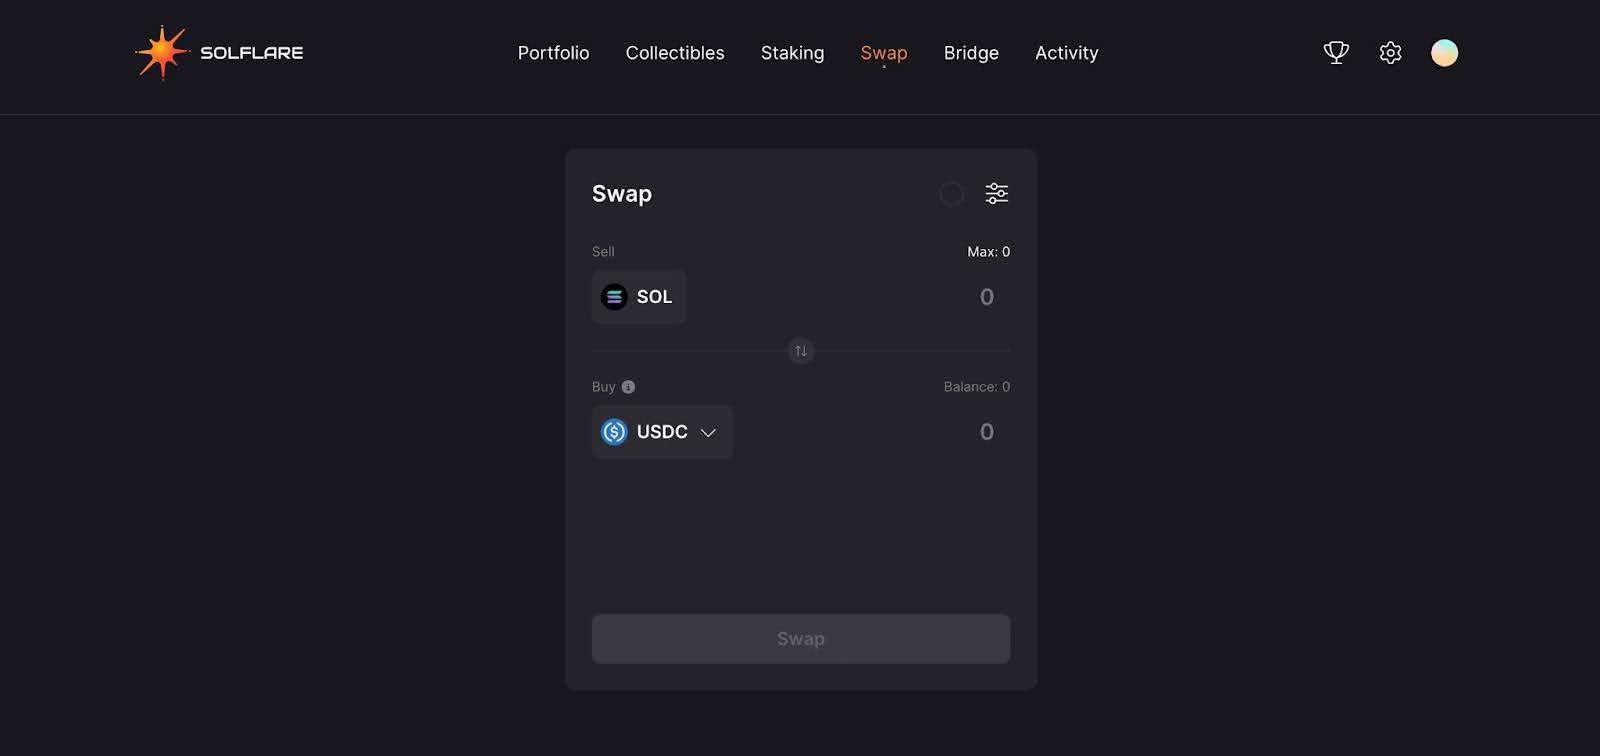
All you need to do is enter the amount of tokens you would like to sell, along with your destination token.
The Solflare Snap also enables the bridging of assets to other networks like Ethereum, BSC, and Polygon. This is done through the bridge section in the Solflare interface.
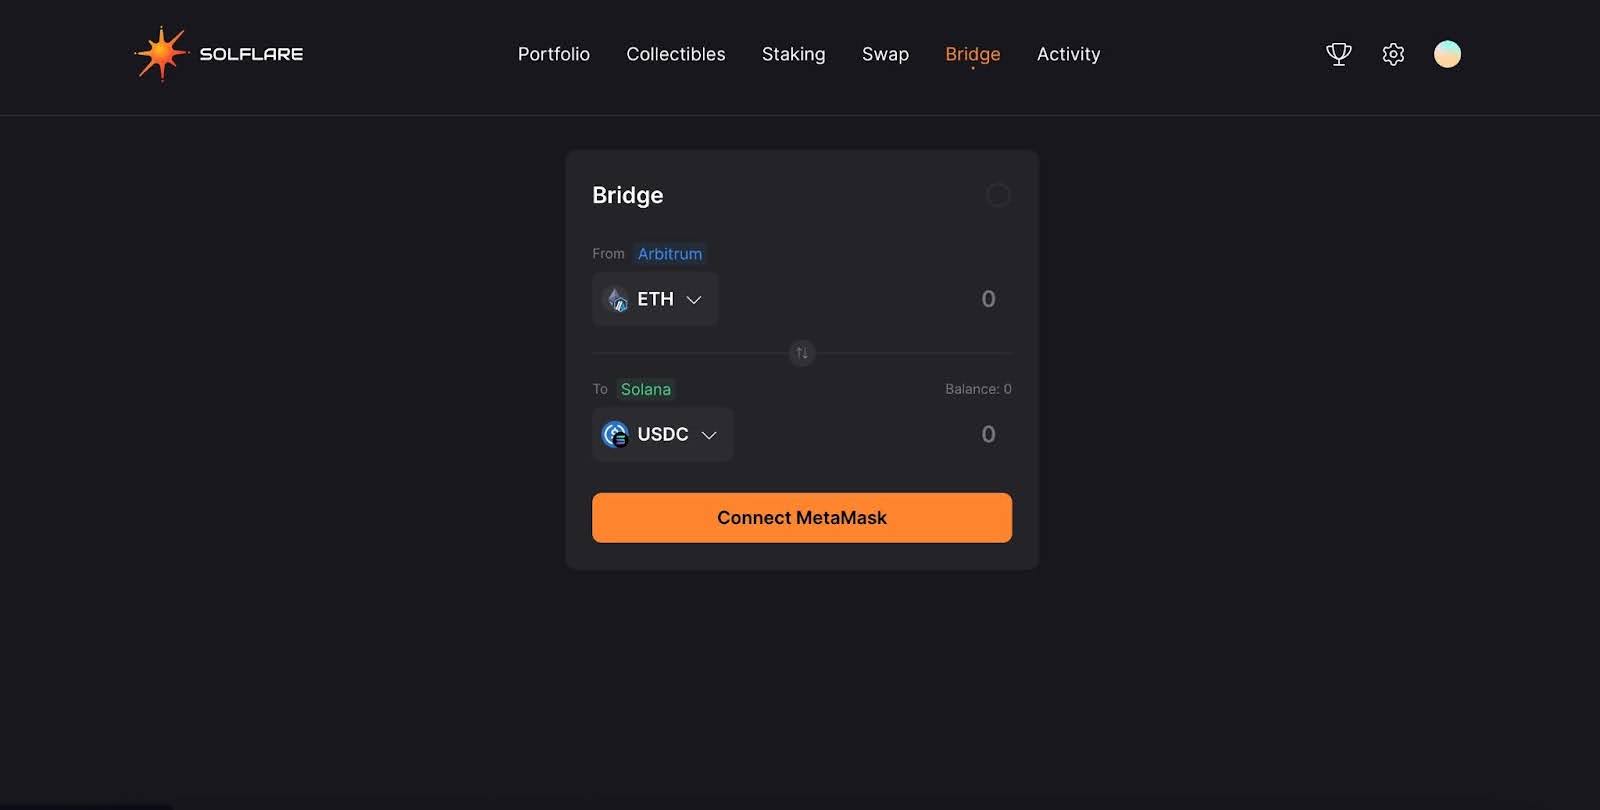
Using the interface shown, simply connect your MetaMask wallet to the webpage, choose a source and destination chain, and choose the token you would like to send and receive.
Once you are happy with the amounts quoted by the bridge, simply approve the transaction in your MetaMask wallet.
Once you have set up the Solflare wallet, you can now connect to Solana dApps that support MetaMask Snaps, such as Marinade Finance. This involves selecting MetaMask as the wallet and establishing a connection through the Solflare connection window.
When integrating the Solflare wallet with MetaMask through the Solana Snap, it’s important to note the relationship between the two. The management of the Solflare wallet is conducted via the linked MetaMask wallet.
In this setup, Solflare does not generate new private keys for the Solana Snap wallet. Your Solana Snap wallet remains uniquely associated with your MetaMask, ensuring consistent wallet details across both platforms.
If you delete or deactivate your Solana Snap from MetaMask, this temporarily severs the link between the two wallets. This action pauses any interactions or transactions between your MetaMask wallet and the Solana Snap.
However, if you decide to reinstall the Solana Snap to your MetaMask, your previously established portfolio is not lost. Instead, it is preserved and becomes accessible again once the Snap is reactivated in your MetaMask wallet.
With this in mind, ensure that you do not lose the seed phrase for your base MetaMask wallet. Doing so would mean you would not be able to recover both your MetaMask funds and your Solflare funds should you lose access to the wallet.
This article provides a foundational guide to connecting MetaMask with Solana using the Solflare Snap. If you are looking to explore this highly popular cryptocurrency ecosystem, it is crucial to understand how to use these integrations in your wallet before committing your funds for investment, and to apply appropriate risk management strategies regardless of what platform you are using.
Here at De.Fi, we give you all the tools to keep your crypto assets safe and secure while getting the most out of DeFi. Find the best yields with Explore, audit contracts for free with Scanner, manage your wallet permissions with Shield, and view your entire portfolio in one place with our DeFi Dashboard.
We also keep you up to date with the latest industry news via our dedicated X profiles @DeFi and @De_FiSecurity. Prepare for the next bull run and explore the vast expanses of DeFi with the De.Fi experts!

January 26 • 6 minutes

October was a month of strong growth and ...
November 7 • 5 minutes

September was a month of global...
October 6 • 4 minutes
August was a month of major...
September 4 • 5 minutes
From major Explore Yields upgrades to...
July 31 • 4 minutes
© De.Fi. All rights reserved.